Vehicles List
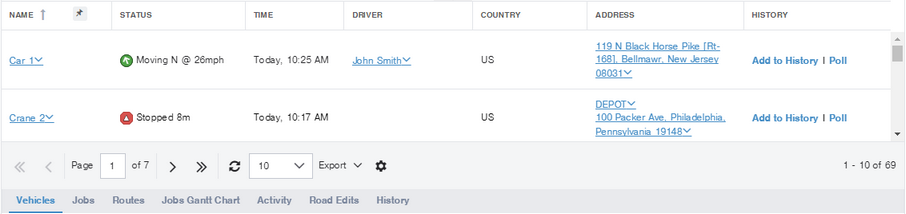
The Vehicles list provides a powerful and convenient way to view, sort, and find information about vehicles (and other assets) quickly and efficiently. To open this list, from the Main section of the navigation bar choose Vehicles, or view the list as one of the list views from the Map screen.
|
The vehicles list is actually a special case of the Map screen, with the map portion hidden. The Map toolbar is displayed at the top of the screen and is described in the section on the map. |
|
If your version includes support for asset types, you can set thresholds for input values when configuring the asset type of a vehicle. When you do that, the background color of the input columns in the list lets you see at a glance if the inputs on the unit are showing values in the desired range. |
In the vehicles list, you can:
| • | Lock the Vehicle name column in place. |
| • | Add or remove columns of information about your vehicles. |
| • | Export the data shown in the list. |
| • | Perform tasks on the displayed items. |
If the vehicles list contains many columns of information, you can easily lose track of which vehicles you are examining when you scroll the list so that you can see the columns on the right. To prevent this problem, you can lock the vehicle name column in place, so that it does not scroll when you scroll the rest of the columns. This way, you can always tell which vehicle you are looking at. To lock the name column so that it does not scroll, click the pin icon in the column header:
When the column is locked, the pin icon is shaded:
To unlock the name column so that it scrolls with the other columns, click the icon again. Its appearance reverts to the lighter version. |
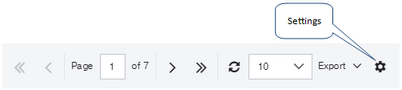
Using the column picker, you can control what information is displayed for each vehicle in the list. If you are an account administrator, you can also control what information is displayed by default for all users of your account. Click the Settings icon
Click the Vehicle List tab to view the column picker. Select or clear the check boxes beside the listed columns to show or hide the columns in the vehicle list:
Click Restore default columns to return your set of columns to the default configuration. If you are an account administrator, the Save default columns option is also displayed. To set the default column configuration for all users of your account, select or clear the check boxes beside the column names until you have the configuration that you want as the default, then click Save default columns. Click OK to confirm your selection. |
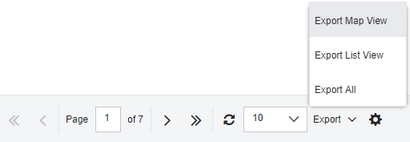
You can export the data that is currently displayed in the vehicles list, or on the map, or all vehicles in your account, to an export file. To export this data:
|
You can click and drag columns to resize them. To move a column, left-click the column header and drag it to a new position. Release the column header when you see the two guiding arrows.
To resize a column, left-click the line that divides two column headers and drag to create a new width. |
To sort by a column, click the column header. |
To change the number of rows displayed in the vehicles list, select a value from the Rows drop-down list:
|
Double-click a row in the vehicles list to display the vehicle details pop-up. In addition, certain columns in the list contain links that let you perform tasks. When you click a link, a menu opens with the options that are available to you. Depending on your user permissions, these may include:
|
 Previous
 Next
Next Expand/Collapse
 Print
Print Share Page
 Training
 Knowledge


 to open the