Single History Screen
If your version of this product uses the single history screen, the vehicle history layer is displayed on the map when you select the History tab of the vehicle details pop-up, click a history link in a pop-up menu on the vehicle name, or click a history link in the vehicle's info balloon.
|
To display histories for multiple vehicles you can display the vehicle details pop-up for more than one vehicle. Once you have all required pop-ups showing, choose the History tab for each of them. |

1: |
History Layer: When the map is replaced by a vehicle history layer, the History Layer label is displayed to indicate this state. Click the "X" on this label to remove the history layer, so that only the map shows. |
||||||||||
2: |
History Trail: The route taken by each vehicle on the day of the history is shown by a line of animated dashes. The dashes move in the direction that the vehicle moved. To change the color for any trail use the display options section of the history controls.
|
||||||||||
3: |
Selected event: The currently selected event in the history is shown by a larger icon. |
||||||||||
4: |
Event summary: Details about the currently selected event are displayed in an info balloon attached to the selected icon. The details include:
|
||||||||||
5: |
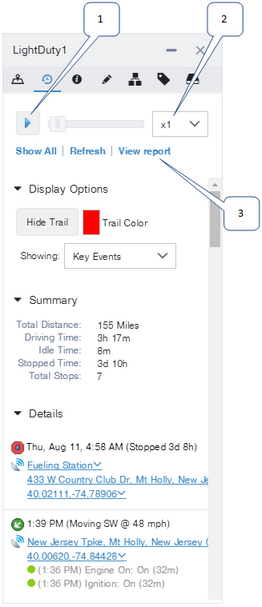
Controls and event list: The history tab of the vehicle details pop-up contains controls for working with the history and a list of all events that comprise the history. Click the links on the tab to launch a history report or shift the time frame of the history to the next or previous day. These controls are described in more detail below. |
|
|
|
The summary section lists statistics about the vehicle's actions during the specified time frame. |
|
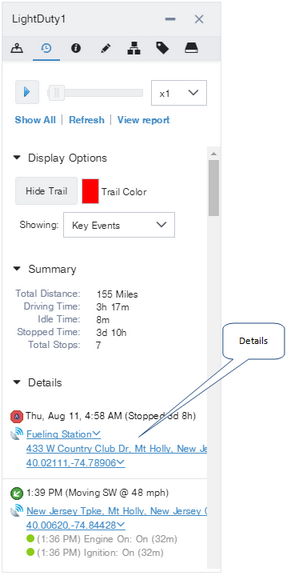
The details section shows the time, vehicle status, and location for every event in the history. In some versions, the GPS quality is displayed below the status icon. If you click an event in this list, the corresponding event icon on the map is selected. |
 Previous
 Next
Next Expand/Collapse
 Print
Print Share Page
 Training
 Knowledge