The Home Screen
To open the Scenarios Home screen, expand the Jobs & Routes menu section to the left of your screen, and then click the Scenarios link.
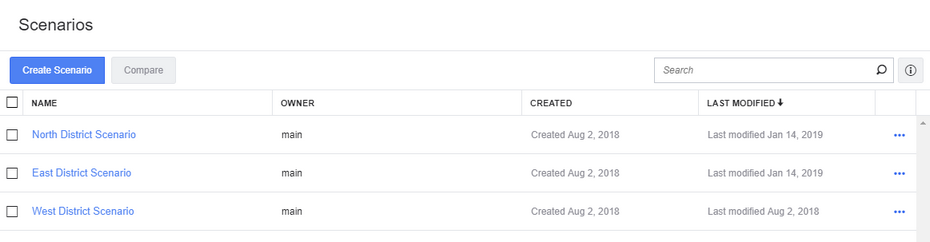
This screen lists any scenarios created previously in your platform account. If no scenarios are shown, it instead shows options to create a new scenario or to import a JSON format scenario file.
To check the version of Verizon Connect® Scenarios™ you are using, hover your mouse over the "Scenarios" text in the upper left corner of the Home screen. A blue Information  button appears. Click this icon to open the About dialog, which lists the version of Scenarios, the name of the account you are using, and other system information.

When a scenario is listed, the columns available on this screen are:
Column |
Description |
|---|---|
ID |
The scenario's unique identifier. |
Name |
The name of the scenario. Click this link to open the scenario. |
Owner |
The account user who created this scenario. |
Created |
The date when the scenario was created. |
Last Modified |
The date when the scenario was last edited, or, if this is a new scenario, the date when the scenario was created. |
|
Click on this button to perform an action on the scenario. You can duplicate, rename, download, and delete the scenario. |
From the home screen you can:
| • | Create a new scenario by clicking the Create Scenario button in the upper left corner or, if no scenarios are listed, the central Create new scenario link. The Create Scenario dialog box opens. Select the method for creating a scenario by clicking on the appropriate Create Scenario button. You can create a scenario from live Verizon Connect data, from a JSON file, or without any data (a blank scenario). For more information see Creating a New Scenario. |
| • | Compare two or more scenarios by selecting the check boxes next to two or more scenarios and then clicking Compare in the upper left corner. The Compare ROI screen shows statistics for the selected scenarios side by side, for easy comparison.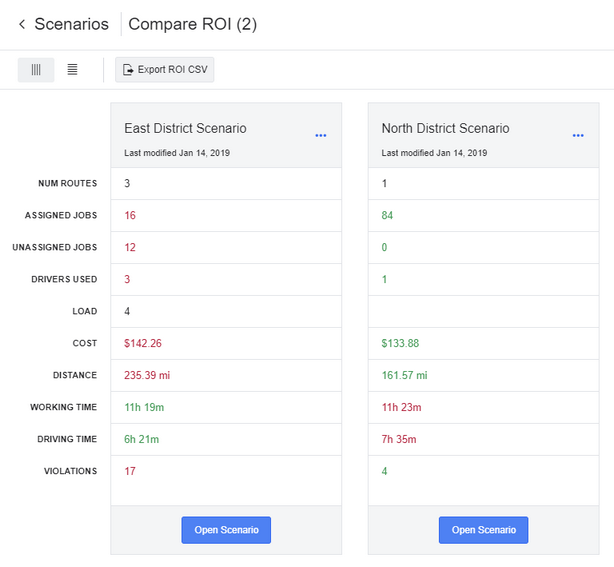 |
| • | Open an existing scenario by clicking on the scenario's name in the grid list. The main user interface for the selected scenario opens. |
| • | Duplicate an existing scenario shown in the grid list by clicking the three dots to the right of the scenario name and then selecting Duplicate in the menu that opens.  The main user interface opens with the details for the selected scenario. The new scenario has a default name that you can change by clicking on the name and selecting Save Scenario. |
| • | Rename a scenario by clicking the three dots to the right of the scenario name and then selecting Rename in the menu that opens. The Rename Scenario dialog box opens, where you can enter a new Scenario Name: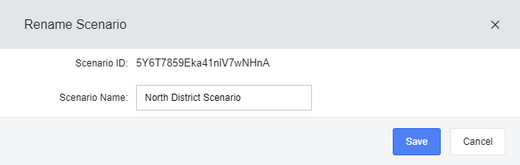 |
| • | Download a scenario as a transportable JSON format file by clicking the three dots to the right of a scenario name and then selecting Download as JSON file in the menu that opens. This feature is useful for creating backups of your scenarios or for emailing files to others in your organization for review. |
| • | Delete a scenario by clicking the three dots to the right of the scenario name and then selecting Delete in the menu that opens. The scenario is permanently deleted. |
If the grid list of scenarios is long, you can use the Search control in the upper right corner of the screen to filter the list to include only scenarios with a name that matches the characters you type. The grid list is updated as you type.
If no scenarios are found with a name that completely or partially matches the text you enter into the filter field, a message is displayed advising you to reset the filter or try a different combination of characters. To clear the filter, click the 'x' button to the right of the search field.
 Previous
 Next
Next Expand/Collapse
 Print
Print Share Page
 Training
 Knowledge