This section describes the steps needed to create a recurring job in your scenario. This recurring job represents a job and the required interval after which the job will recur. Recurring jobs can also be specified as one-off jobs, in which case they do not recur.
The information you need to provide in a recurring job is similar to that needed when creating a job. The primary difference between the two is that your recurring job does not require job date information, as the actual dates of the jobs generated from a recurring job is typically chosen automatically. Instead, you supply information about how often the job should be completed, and a start and end date range within which to create these jobs.
This page describes the information needed when creating a single recurring job. If you want to add several recurring jobs at once using an import file, see Importing and Exporting Recurring Jobs. If you have already created recurring jobs and you want to edit their details, see Editing Recurring Jobs.
To create a recurring job:
1.
Open the list menu in the upper left corner of the List panel and select the Recurring Jobs option. The Recurring Jobs list opens.
2.
Click the Create recurring job button on the List panel tool bar. Alternatively, click the More menu button in the upper right corner of the List panel and select the Create Recurring Job option.
3.
The Recurring Job dialog box opens.
4.
Enter the relevant recurring job details under each tab in the Recurring Job dialog box:
o
Job Details - Specify basic information about the recurring job, including name, ID, location, priority, and preferred driver.
o
Frequency - Specify how often and on which days the recurring jobs can occur.
o
Time Windows - Specify up to two time windows within which the driver is permitted to arrive at the location of this recurring job.
o
Load - Specify the load, or loads, required by the generated jobs.
o
Requirements - Specify the attributes that are required to be present or absent on a route that this recurring job is assigned to.
o
Linked Stop - Enable and define a marker to function as a linked stop for this recurring job.
o
Tags - Specify custom tags for attributes to associate with this recurring job.
o
Notes - Enter some notes about this recurring job.
o
Custom Properties - Add your own customer-defined properties to this recurring job, such as customer contact details or maintenance and holiday schedules during which deliveries are not required. These properties are shown on the Recurring Jobs list and can be used to sort the grid.
Job Details
The Job Details tab lets you add the following information:
•
ID - The unique identifier of the recurring job. This is generated automatically if left empty.
•
Name - The display name of the recurring job.
•
Code - The recurring job's code.
•
Type - The recurring job's type.
•
Preferred Driver - The preferred driver for the recurring job.
•
Priority - The priority of the recurring job. Available priority values are "Lowest", "Low", "Normal", "High", or "Highest". This field defaults to "Normal".
•
Location
o
Existing Marker - The existing marker that will be used as this recurring job's location. Leave blank and enter a street address if this marker does not yet exist.
o
Address - The physical street address of the recurring job.
o
Country - The country of the recurring job.
o
Location - The location of the recurring job as a WGS84 latitude and longitude coordinate pair.
Frequency
The Frequency tab lets you add the following information:
•
Earliest Date - The earliest date when jobs based on this recurring job can be created. A job based on this recurring job cannot be created before this date. If empty, the date of the earliest route is used.
•
Latest Date - The latest date when jobs based on this recurring job can be created. A job based on this recurring job cannot be created after this date. If empty, jobs based on this recurring job will recur indefinitely.
•
Recurrence Type - The type of recurring job to base jobs on. This can be "One off", "Daily", "Weekly", "Monthly by day of week", "Monthly by day of month", "Times per week", "Times per month", or "Times per year". For example, when using "Weekly" and a value of "2", a job is scheduled every two weeks.
•
Frequency - The frequency of jobs based on this recurring job. Applies to all recurring job types apart from "One off".
•
Vary Before - The number of days that jobs based on this recurring job can be scheduled before the base date. The default is 0.
•
Vary After - The number of days that jobs based on this recurring job can be scheduled after the base date. The default is 0.
•
Base Date - The date to base this recurring job on. If not set, Scenarios chooses the base date for the recurring job.
•
Allowed Days of Week - The days of the week when jobs based on this recurring job can be completed. The default is all days. Click the All Days link to select all days.
Time Windows
The Time Windows tab lets you specify the following information:
•
Time on Site - The default time that the recurring jobs will require on site.
•
Time Window - The time periods when a job based on this recurring job can occur. You can select up to two time periods, for example one before lunch and one after.
Load
The Load tab lets you add the amount of an arbitrary load that is delivered or picked up at the job site. Choose between Deliver and Pickup for this particular job.
Requirements
The Requirements tab lets you add the following information:
•
Requirements - Tags for attributes that the recurring job must have.
o
Driver Tags - Tags that apply to drivers and that you define in this field or that have been defined on the Tags screen in the Verizon Connect platform.
o
Vehicle Tags - Tags that apply to vehicles and that you define in this field or that have been defined on the Tags screen in the Verizon Connect platform.
o
Route Tags - Tags that apply to this recurring job's route and that you define in this field or that have been defined on the Tags screen in the Verizon Connect platform.
o
Earlier Depot Tags - Tags that define depots that drivers must go to before the recurring job; for example, as part of a pick-up. Add new tags or select tags from the list. The list contains all tags that have been defined in Scenarios.
o
Later Depot Tags - Tags that define depots that drivers must go to after the recurring job; for example, as part of a drop-off. Add new tags or select tags from the list. The list contains all tags that have been defined in Scenarios.
•
Restrictions - Tags for attributes that the recurring job may not have.
o
Forbidden Drivers - Drivers that are forbidden from completing this recurring job.
o
Driver Tags - Tags that apply to drivers and that you define in this field or that have been defined on the Tags screen in the Verizon Connect platform.
o
Route Tags - Tags that apply to this recurring job's route and that you define in this field or that have been defined on the Tags screen in the Verizon Connect platform.
To add a tag, start typing the name of the tag and then do either of the following:
•
Select the tag from the list.
•
Enter the complete name and press the Tab key on your keyboard.
You can enter more than one tag. To remove a tag, click the 'x' button next to the item.
Linked Stop
This feature is option-controlled. Contact support to get this feature enabled in your account.
The Linked Stop tab lets you add the following information:
•
Enable linked stop - Whether to use linked stops, which will always be routed one after the other and not separated, because they might involve a pick-up and subsequent drop-off.
•
Time on Site - The time spent on the site of the linked job.
•
Existing Marker - The existing marker that will be used as the linked job location. Leave blank and enter a street address if this marker does not yet exist.
•
Address - The street address of the linked job.
•
Country - The country of the linked job.
•
Location - The location of the linked job as a WGS84 latitude and longitude coordinate pair.
Tags
The Tags tab lets you add special attributes that the recurring job possesses; for example, a driver's skill, a vehicle's ability to carry a particular load, or a high urgency.
To add a tag, start typing the name of the tag and then do either of the following:
•
Select the tag from the list.
•
Enter the complete name and press the Tab key on your keyboard.
You can enter more than one tag. To remove a tag, click the 'x' button next to the item.
Notes
The Notes tab lets you add any notes about the recurring job.
Custom Properties
The Custom Properties tab lets you add the following information:
•
Name - The name of a custom property. These arbitrary properties are not used for optimizing routes, but are added as columns to the Recurring Jobs list, and can be useful for sorting and filtering purposes. For example, you could use these properties to specify additional data not included by default in Scenarios, such asthe contact details of the customer at this job, or historical notes relating to the job. These values can then be sorted in the grid by clicking the column header. Click the Add Property button to add a new Name and Value pair, or delete the content of an existing property pair and then click Save to remove them.

 button on the List panel tool bar. Alternatively, click the More
  menu button in the upper right corner of the List panel and select the Create Recurring Job option.
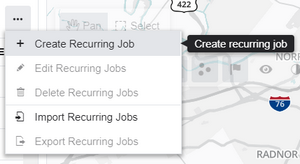


 Previous
 Next
Next Expand/Collapse
 Print
Print Share Page
 Training
 Knowledge