Use the Add Job dialog box to enter the details of a new one-off job, which you can then assign to the best route automatically, or manually assign to a route of your choice.
If the job needs to be repeated at regular intervals (for example once a week, or several times a month, you should instead create a recurring job. Once created, the optimizer engine ensures that this recurring job is routed at the best time on the best routes according to the repeating schedule details you configure.
To create a new one-off job:
1.
Select the date of the new job using the date control in the upper left corner of the Jobs List panel, or change day using the left and right arrows to move ahead or back one day at a time:
2.
Press the Add Job button () at the top of the Jobs List. The Create Job dialog box opens.
3.
Type a descriptive name for the new job into the Job Name field. This is the name that appears in the list of jobs.
4.
Type a job code, if needed, into the Code field. This field is optional, but can be useful when filtering the jobs list using a filter control.
5.
Select the new job's "type" from the Type drop-down list. These are created from the Job Type screen of the main platform interface (within the Tasks section of the main menu). Job types can be used to identify the task your driver performs when servicing a job, such as reading meters, delivering products, performing scheduled maintenance at customer sites, handling emergency service calls, and so on.
Once you have selected a job type, preferred driver, job location and territory you can quickly access the editor dialog boxes for your chosen settings by clicking on the 'details' button () to the right of these fields.
6.
Select the driver you want to complete the job from the Preferred Driver control. This driver will be used for the job unless they are otherwise unavailable (for example, if they are not working on the day of the job, or if the job is scheduled to occur outside their shift hours). If the driver cannot be used for the job, an exception is generated (whether this violation is regarded as critical or non-critical will vary depending on your violations and warnings configuration).
7.
Select the priority of the job from the Priority drop-down list. Available priority values are "Lowest", "Low", "Normal", "High" or "Highest". This field defaults to "Normal".
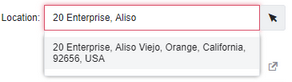
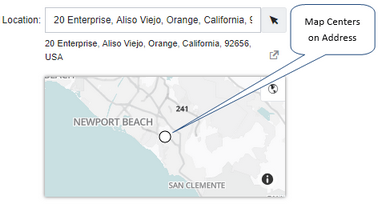
8.
Type an address into the Location field. You can also type the name of an existing job or marker. As you enter characters, and then words, matching addresses and names are displayed, and can be selected. The addresses suggested to you are influenced by the city, region and country currently visible on the mini-map, which can be zoomed into using your mouse scroll-wheel, and panned by clicking and dragging the map. Alternatively, you can click the arrow button () to the right of the text field to convert your mouse cursor into a cross-hair selector, and then click a location on the mini-map (use your mouse scroll-wheel to zoom in and out of the mini-map, and click the arrow button to return the cross-hair selector to a hand, to drag the map to a different location). The street address closest to the selected location is inserted into the Location text field, and the physical location of the address shown in the mini-map below it.
Click the globe icon in the upper right corner of the map to toggle between satellite imagery and normal map view.
9.
Choose the territory that contains this job. A territory consists of customers, depots, drivers and vehicles. Only territories that have previously been configured in the fleet management platform (Jobs & Routes > Territories)can be selected in Verizon Connect® Dispatch™. If you have already selected a territory using the territory selector tool above the map, this territory is selected automatically.


 ) at the top of the Jobs List. The Create Job dialog box opens.
 Previous
 Next
Next Expand/Collapse
 Print
Print Share Page
 Training
 Knowledge

