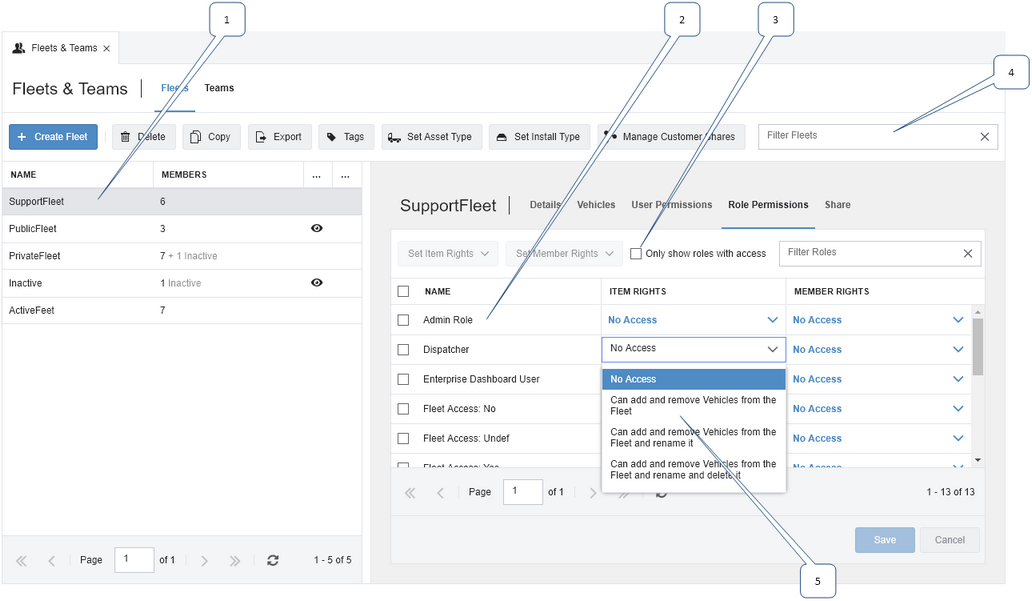
The Role Permissions tab lets you control which roles can work with the selected fleet or team.
1:
Select the fleet or team whose roles you want to configure. The Roles Permissions tab shows roles' current rights for working with the selected fleet or team.
2:
The list of roles indicates, for each role, the rights they currently have for working with the selected fleet or team. These are divided into item rights (rights to add or remove members, to rename the fleet or team, and to delete it) and member rights (rights to see, view details on, or edit the vehicles or drivers in the fleet or team). Click a user to change their rights if the fleet or team is not Public.
3:
Select the Only show roles with access check box to filter the list of users so that it displays only roles that already have rights to the selected fleet or team.
4:
Enter all or part of a role name to filter the list of roles.
5:
Use the controls in this portion of the screen to assign rights to the currently selected role. For public fleets and teams, these rights are in addition to any rights the role may have for any fleet or team. Click the current setting under the Item Rights or Member Rights columns to open a menu, then choose a permission level for the selected role.
 Previous
 Next
Next Expand/Collapse
 Print
Print Share Page
 Training
 Knowledge