Form pre-population minimizes the amount of data drivers have to enter into forms within the WorkPlan app. When a driver opens a form, some of the fields contain pre-populated values depending on the driver's current status or action. You can configure certain form fields to automatically pre-populate within the Form Templates.
Pre-population differs to auto-population (part of Typeahead Search) in that pre-population occurs when the form is first loaded and no user interaction is required.
Currently the Text Box and Location form element types can be configured to be pre-populated. The following information can be pre-populated:
•
Current date and time
•
Current location
•
Current job information
•
Current driver information
•
Current vehicle information
•
Current driver status information and time spent in the status
•
Custom data
Limitations:
•
If the driver's mobile device is offline, the form is pre-populated with values currently available on the device. Fields that cannot be pre-populated with values either display default values (if configured) or are blank.
•
To minimize form loading times a maximum of 20 fields per form can be pre-populated.
Adding a new pre-populated form field is similar to adding any other form template element, as described earlier in the adding and configuring elements section.
To add a new pre-populated text box:
1.
From the Tasks section of the navigation bar choose Form Templates.
2.
Click Create in the left panel to define a new form template, or select an existing template from the list.
3.
In the Form Builder tab in the right panel, click Add Form Element.
4.
Change the Type drop-down list to Text Box. Text Box and Location are the only two form field types that can currently be configured for pre-population.
5.
Type the name of the field, for example, "First Name" or "Address" into the Name field.
6.
If you define a default value (in the Text Value field) the pre-populated values take precedence. The default value is only displayed in the driver's form if the driver's mobile device is offline and the WorkPlan app cannot retrieve the data to pre-populate the field with.
7.
Click the Advanced button. A new control opens below the form element.
8.
Click the Prepopulate tab.
9.
From the Data Source drop-down menu choose the table that contains the data you want to use for pre-population. In this example, the "Driver" option is selected. The Driver table contains information about your fleet's drivers (names, addresses, contact and license details).
10.
From the Data Source Field drop-down menu choose the column that contains the specific values you want to use for pre-population. In this example, the field "FirstName" is selected.
The Data Source Field drop-down list includes the default columns found in customer databases. However, your organization may have requested one or more custom columns to meet its unique needs, such as driver certifications or preferred job site entrances. To select a custom column and add it to the drop-down list:
o
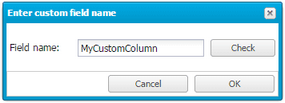
Select the Select custom column option. A pop-up opens.
o
Type the name of a custom column into the Field name field.
o
Click the Check button to validate the column name. A validation dialog box opens that indicates if the column has been found in the selected table.
o
Click Close, then click the OK button to use the entered column name. The custom column name is added to the Data Source Field drop-down list.
Adding a new pre-populated form field is similar to adding any other form template element, as described earlier in the adding and configuring elements section.
To add a new pre-populated location:
1.
From the Tasks section of the navigation bar choose Form Templates.
2.
Click Create in the left panel to define a new form template, or select an existing template from the list.
3.
In the right Form Builder tab, click Add Form Element.
4.
Change the Type drop-down list to Location. Text Box and Location are the only two form field types that can currently be configured for pre-population.
5.
Select the Populate this location element when the form is opened check box.
 Previous
 Next
Next Expand/Collapse
 Print
Print Share Page
 Training
 Knowledge

 in the left panel to define a new form template, or select an existing template from the list.